
But for now, I am very happy with the finished product! I still need to purchase some plastic storage units from Target for the closet (for additional storage of clothes, diapers and toys), but the bulk of the work is done.
I find myself going in there to read in my glider chair and enjoy the peaceful feel of the room. I'm enjoying the calm now, because I know our lives will be turned upside down very soon! In a good way :)

First off, we bought our nursery furniture from Babies "R" Us during a 20 percent off sale. This is a must for all parents! It saved us hundreds of dollars and the furniture shipped very quickly. We got the Manchester Black Cherry Collection from Carter's, and it was surprisingly easy to put together, even for non-handy people like us. Like most new cribs, this will convert to a toddler bed and then a twin size bed. When budgeting for kids furniture, I say it's OK to spend a little more on items that are guaranteed to grow with them for years to come. We just got lucky that all furniture was on sale when we went in to buy!

The walls are Behr's "Scented Valentine" in an eggshell finish. The butterflies are from Target, and I simply placed them in what looked like a cute formation to me, like they are all flying upward following the first little guy.
I ordered the cute birdie prints on Etsy, and re-purposed some old frames and mats to match my color scheme. I just painted the frames white, and painted the mats with leftover wall paint. Any time I can re-use something old and make it new, I always do it! Not only are you saving money on a shopping trip, but you're freeing up storage space by getting those old frames out and up on the wall!
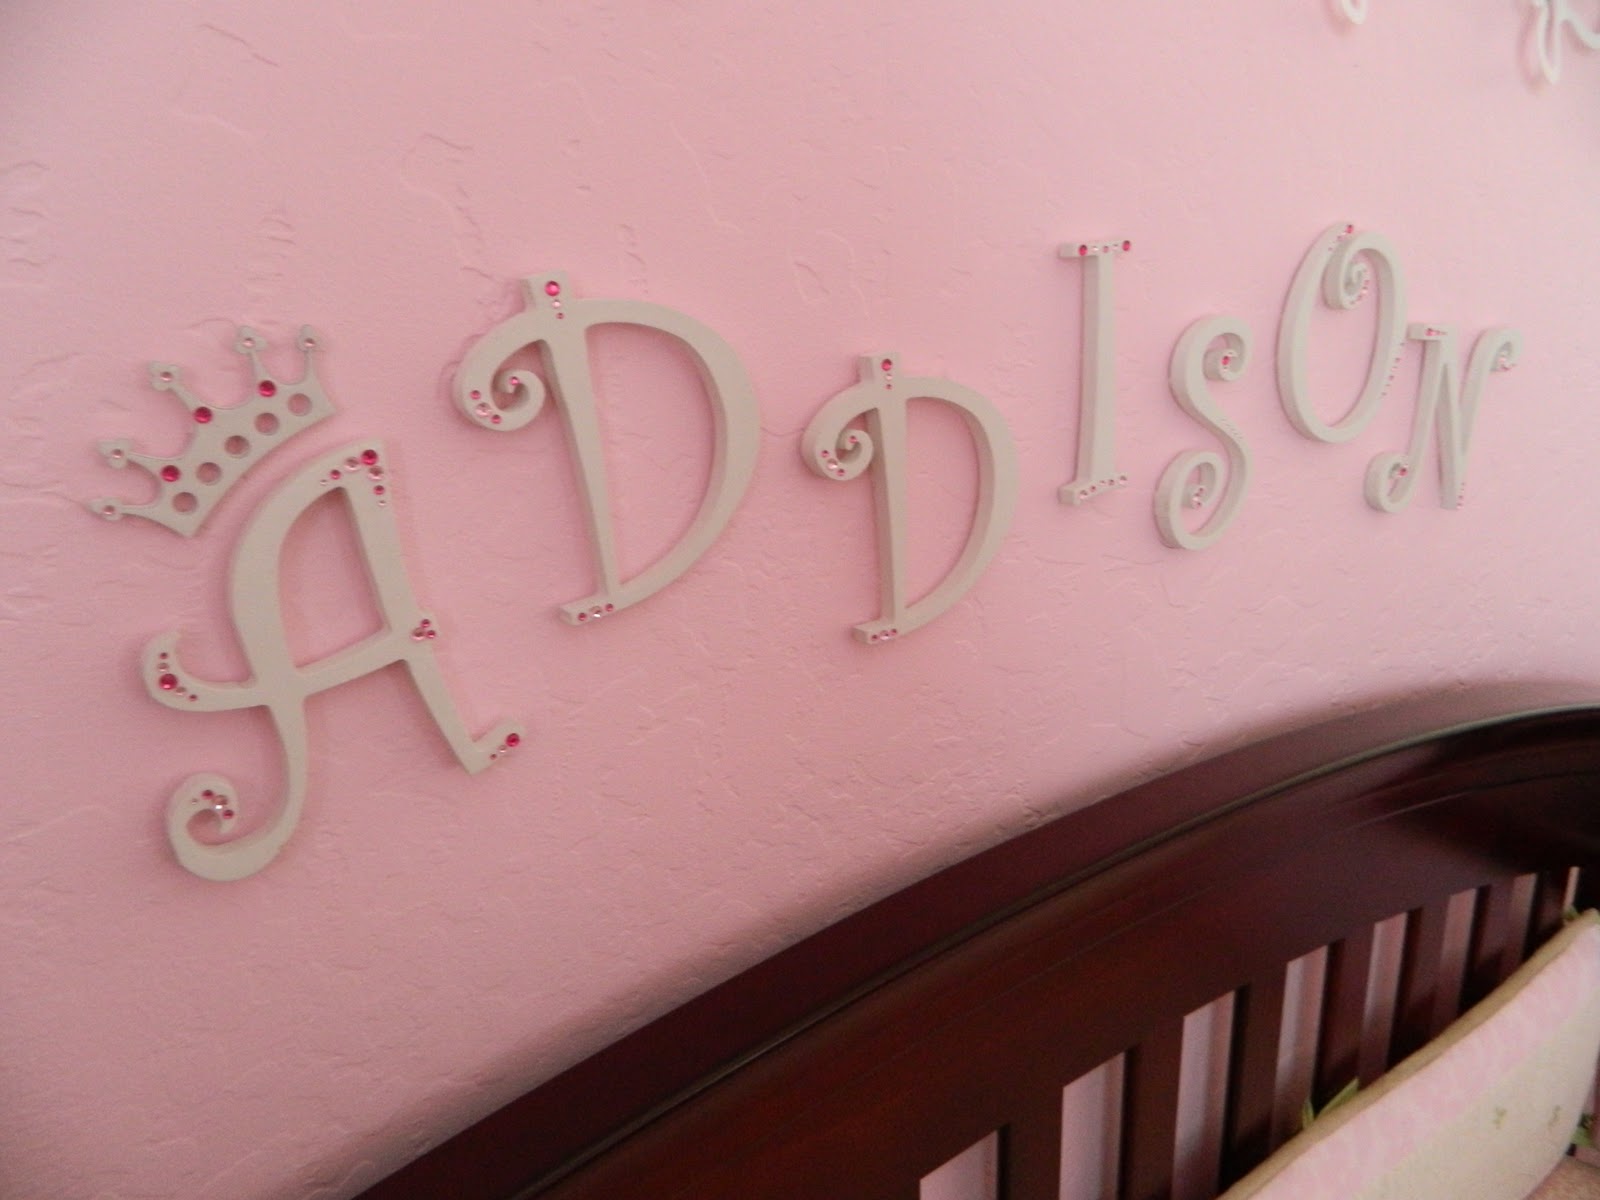
The letters were a no-brainer: Just wooden letters from Michael's coated with glossy white spraypaint. I didn't want to go overboard with color by painting them bright pink or green, so I purchased a couple packets of sticky-back rhinestones from the scrapbooking department, and placed them as embellishments on each letter. To ensure that they don't fall off, I coated each letter generously with Mod-Podge. If you get the glossy kind, this adds extra sheen!
The letters are affixed to the wall with Command Picture Hanging Strips, cut into thin pieces to fit behind each letter. I realize now that I will need to move the letters up higher (maybe above the butterflies) when Addison is old enough to pull herself up, because she'll be able to yank these off the wall pretty easily. Lesson learned!

This is my favorite part of the room: our reading corner! I'll get to the paper lanterns in the next pic, but for now, I'll describe the rest of it. We got this glider from Walmart for $150, and I absolutely love it! It looks and feels just like the $600-$700 ones from BuyBuyBaby, but for a fraction of the cost. And you have to consider the fact that it will only be used for a couple of years, so why break the bank on pieces that won't be necessary past toddlerhood?
The book ledges on the left are from Land of Nod, and I absolutelty love them. What a perfect way to display your children's books, while keeping them very accessible and visible. The cube shelves on the right were from my favorite store: my mom's junk closet! She happened to have a few gems in there, just waiting to be utilized in the nursery! If you're on a budget and can't afford to go shopping, definitely check with freinds and family to see if they have any items they are not using. You can do a trade for your unwanteds, and/or offer to help them organize a room in their house (in exchange for some loot!).

These paper lanterns were super easy, super cheap and make a big impact. I found this great website, http://www.paperlanternstore.com/ that sells these for dirt cheap. Just don't forget to order the lightbulbs and cord kit, or all you've got are some cute paper balls.
Now, I am a freak about messy cords. This can be a problem with these types of lanterns, unless you make one important purchase at your local hardware store: plastic cord concealers, with an adhesive back. These are also called conduits, I believe. Anyway, since the lanterns are so lightweight, you don't even need to hang them with a hook from the ceiling. You can just cut the conduit to the size you want, run the cord through it, stick to the ceiling and voilà! I also ran two conduits down the wall (you can see them better in the previous pic) to conceal the cords down the wall, and painted them with leftover wall paint. Double voilà!
I'm sure I will have more to post as far as nursery organization goes, once we get more stuff. But for now, this was the best I could do with a tight budget and a few DIY ideas in my back pocket!


