Showing posts with label Baskets. Show all posts

Thursday, March 15, 2012

Kitchen Clutter Busters

They say the kitchen is the heart of the home. And ya know what? I think they're right.

It's where we entertain, gather for family dinners and grab snacks and drinks throughout the day. In most houses, it's the central hub of activity - yet many kitchens are neglected in the organization department. This doesn't make any sense to me.

Why wouln't everyone want to run their kitchen like a restaurant kitchen, with everything labeled, inventoried and in its correct place? We should all take a cue from our favorite eateries and get with the program. Everything should have a designated place, preferably inside of a labeled storage container, so there is no confusion as to where something's "home" is.

I'm still in the process of getting my kitchen up to par, because unlike a restaurant, I'm not making any kind of profit by whipping up my meals. So I'm taking it piece by piece, but I've come up with some pretty good (and cheap) solutions so far.

My freezer is my secret weapon. Here's a peek inside:


All I did was purchase eight of these baskets at the dollar store, and print out "labels" on the computer. It's just a Word document I printed out with all of my food categories, and I cut and taped them to each basket.

I can go two baskets deep on the middle shelves, and one deep on the top and bottom shelves, for a total of eight.

The categories I included are:
  • Smoothie packs (I make pre-made baggies of frozen fruit for smoothies)
  • Desserts (Ice cream, popsicles, etc.)
  • Snacks & meals (for Hot Pockets, TV dinners, etc.)
  • Veggies
  • Sides
  • Meat
  • And another "Meat"
  • I have an empty basket at the bottom for miscellaneous stuff

One tip when freezing things: Always freeze FLAT. See how nicely these Ziploc baggies of fruit fit into this basket? Even if you don't use baskets, you'll maximize your frozen real estate when you freeze ground meats, soups, sauces or anything else while laying flat. Then you can stack them, or slide them into a basket like so.
 
 
The main reason I did this freezer organization was to organize my frozen meats. We always buy in bulk and separate things into meal-sized portions, to pull out when we cook certain meals. It's so important to me to avoid wasting food as much as possible, so it's essential that I have a clear inventory of what we've got in stock! And it's really as easy as bundling all our meats into these two baskets, so I can easily pull them out and find what I need.
 
 
Now, onto some more clutter-busting organizational goodness around my kitchen:
 
 
Here's a look at how I organize my measuring cups and spoons. They were taking up too much room in the drawer, so I used these Command Hooks to hang them up nice and neat.
 
 
This really isn't that original, but an over-the-door spice rack is a must for every kitchen. I may venture into the magnetic spice tin zone at some point, but for now, this works just fine. Again, I used Command Hooks to hold this baby up. Using cabinet doors for storage is essential! Always look at your cabinet doors for possibilities, when your cabinets are getting a little too cluttered.
 
 
I love these stackable storage bins for our medicine cabinet! I bought four, and labeled them with four different categories:
  • Pain relief & cough/cold
  • Vitamins (I have a lot of prenatals!)
  • First Aid
  • Prescriptions/Misc.
This way, we can grab what we need, or pull out the bin we need and look through it. Before, it was a nightmare rifling through the mess of bottles and packets. Now it's so incredibly easy to find exactly what we need!

I hope to add more to this Kitchen Clutter Busters post, as soon as I finish more projects. My next goals are to get some nice containers for my pantry items and dry goods, to cut down on the store boxed items cluttering up my space.

Until next time!

Saturday, March 3, 2012

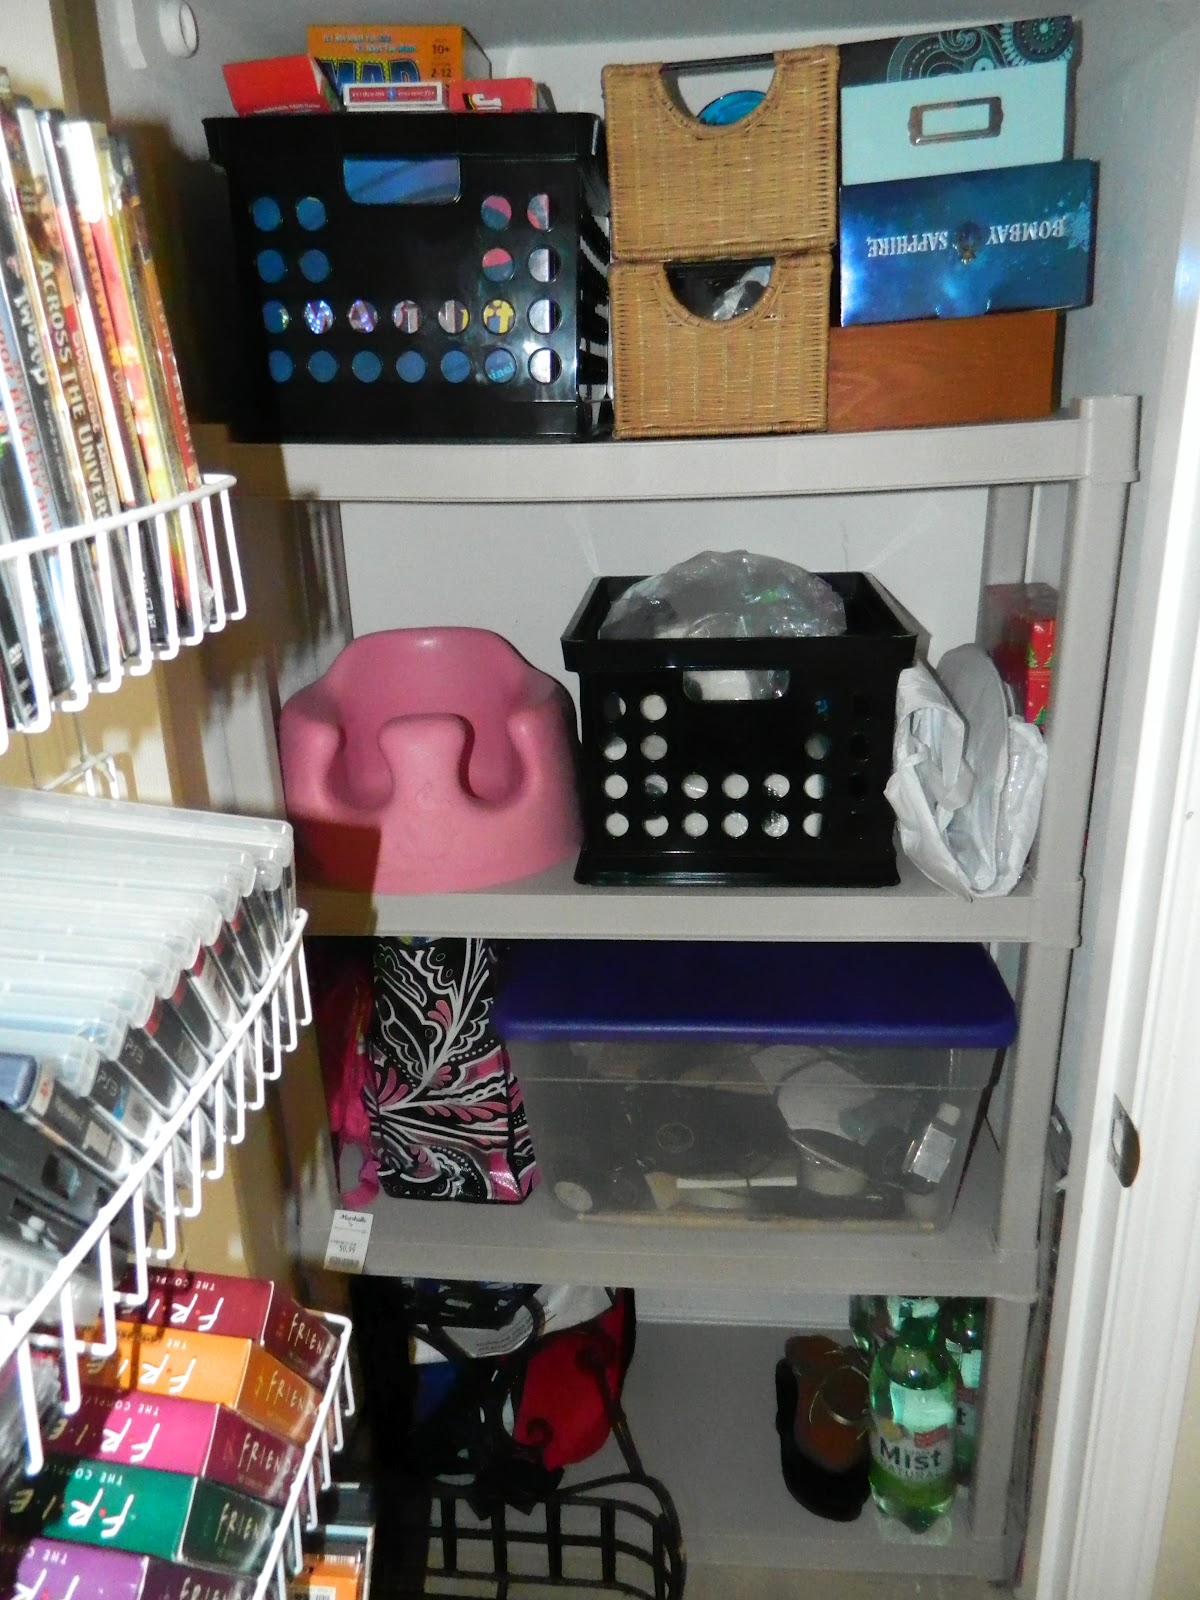
$60 Hall Closet Revamp

To put it nicely, our house is very cozy. (r.e. - small, at least downstairs).

I've already posted about my open floor plan, which I adore, but we do have some space constraints that force me to get creative when it comes to storage. We have one small coat closet downstairs and no pantry or storage closets, so I've had to use this closet to house all of our stuff that compiles and compounds over the years.

Not to mention, I'm bracing for much more stuff to pile up once the baby arrives (any day now!). The ugly, mis-matched state of affairs was pretty sad to look at so I needed to identify what purpose this space needs to serve.

Before I shock you with the ugly "before" picture, here is my pretty hall closet now:


But here it what it looked like before:


Pretty ugly, right?

So I broke things down into several main storage needs that must be filled:
  • My husband's work accessories (he's got a lot of gear, and always comes home with paperwork and notebooks that I cannot throw away! Argghhhh!)
  • My hudband's hockey stuff (same idea here - just a bunch of crap I can't throw away, and must be at the ready when he takes off for a game)
  • Games (these include board games, party games and accessories for our PS3, xBox, and that motion-sensor game thingey, including all cords and cables. Obviously I'm not a huge gamer.)
  • Batteries/Camera/Camera accessories. (no more searching through the house for the USB cable to upload pics, or for those AAA batteries you need in a pinch)
  • Toys! (we hardly have any yet, but I know we'll need a place to stash them downstairs when I want to do a quick tidy-up without running upstairs to the baby's room)
A quick trip to Target and a peek through the clearance, and I came up with this:

Now, think back to kindergarten when everyone had their own little cubby. That wasn't such a bad idea!

I bought nine of these canvas storage cubes for $6 each, and simply filled them up with our stuff.


To brighten things up a little more, I found these vibrant cards in the clearance end-cap of the greeting card section:


Then I just wrote with Sharpie on some sticky labels, slapped them on these cards (which I glued shut with a gluestick), and hot-glued the finished product to the front of my bins, like this:


Of course, I measured the width and depth of my shelves before buying these cubes. They happened to be 10x10, which fit my 30-inch shevles perfectly! And I love how the bright colors make this a much more cheerful space.

I needed bigger storage on the bottom shelf, so I re-used some old plastic bins we had and slapped some labels on those too.


I just love that everything has it's own little place!

My next goal is to remove the hanging DVD rack on the door, get some media file bins from The Container Store, and trash the bulky containers altogether. Once we start building up a movie collection for the little one, we will keep those in their cases so she can pick and choose what she wants to watch. But for our DVD collection, it's just too bulky and taking up valuable real estate on the inside of the closet door.

Down the road, I'm thinking we'll use another kind of over-the-door storage rack to corral kid stuff or other odds and ends. Oh, and I have a shoe rack and coat/purse hooks in the entry way, making the need for coats in my "coat closet" obsolete. Here's a pic:


And here's one more look at my cheap, quick and easy, $60 hall closet revamp:


Now it's on to the next project!


Wednesday, February 22, 2012

$40 Laundry Closet Makeover

In my last post about my laundry room, I showed you how I transformed my blank slate into a functional and cute space. I wasn't ready to show you the closet though ... until now!

Here are the "before" pictures. It's a sliding closet door, so I have to take pictures one at a time.

Pretty sad, and a pretty bad use of space. I had this dumb little hanging wrapping paper organizer, which hardly held any wrapping paper rolls and bows, and leaned forward with the weight of the rolls, which always bothered me. I just stuffed all of my bags and bows into the plastic storage container on the right, making it very difficult to find what I needed!

A quick trip to the hardware store and the Dollar Tree and just $40 later, I wound up with this:


Much better, right?!

 
I spent $30 on these two 36-inch wire shelves to make use of the vertical space I was losing out on, since I don't hang anything from the closet rod anyway. Here's a side-by-side look:


This is just a much better use of the space. And please ignore the gross cat litter box in the bottom right, but it's got to go somewhere! To explain all the bottles, they're what's left of our five-year supply of household cleaners that came with our water softener unit. They're pretty much a waste of space because I buy the nicer stuff in stores anyway, but it's good to have back-up in case we need it.

For my gift wrapping station, I just sorted my bags into categories, and labeled baskets for each category, as well as tissue and tags, ribbons and bows. I can stash my gift boxes off to the side, as there is some room between the baskets and the wall.

Down below, I came up with this idea for storing my wrapping paper rolls:


I had some elastic from the craft store, and simply staple-gunned it to the walls to create a little cozy spot to hold my rolls up. Here is a close-up:


And here's what I did to sort our laundry and keep it tucked away inside the closet:


Pretty ingenius if I do say so myself ... for a whopping $4. I used three Dollar Tree bins and a pack of Dollar Tree knock-off Command Hooks to hang them, which are surprisingly durable! Well, I can say that I've had each of these bins full of laundry overnight and they didn't fall down, so I'm thinking we're good to go. As for the labels, I'm still relying on handwritten tags to do the trick. They're not very fancy, but I'm trying to keep things as cheap and easy as possible!

So that's my $40 makeover! Just like the washer and dryer space on the opposite side of the room, everything has its perfect little place. Now, wrapping gifts and sorting laundry will be as enjoyable as possible :)

Here's one last look at my little creation:


Thursday, February 16, 2012

Laundry Room Love

Ironically, my laundry room is one of my favorite spaces in my house, despite my hatred for the actual task of doing laundry.


I say this because it's one of the few rooms where everything has a perfect little place, and I know exactly where to find just what I need. The rest of the house is still obsessively organized - don't get me wrong - but I'm still in the process of beautifying my organization systems so they are visually pleasing and blend with my décor.


So without further ado, here's a peek into the method behind my madness:


This room is right at the top of our stairs, so it has to look nice because it's the first thing people see when they go upstairs. You can't really tell in the picture, but the walls are a very soft blue. We also have a closet behind the door, which is being used to store extra bed linens, gift wrapping supplies, and Space Bags filled with extra pillows and things. I am not showing you yet, because it's a mess and on my to-do list of organizing!


My goal here was to eliminate "dead space." So, we installed these cabinets purchased on sale from Home Depot, and I screwed in some cute door pulls. Then, I found these black canvas storage bins on clearance at Target, perfect for extra storage above the cabinets! Finally, I pushed the washer and dryer apart so I could store our laundry detergent, dryer sheets, wastebasket and a mini step-stool in the storage cart between them.


Here is the best part: the organization! I just corralled everything into these little bins and made labels for each one. The blue ones were from the Dollar Tree, the white ones were from Save Mart and the wicker ones were from Target on clearance!


The left cabinet holds bins labeled "cleaning products" and "pet odor & carpet care." I don't have a label maker yet, or any fancy crafty stuff to make the labels look cuter, but I did have some leftover place cards from the Dollar Tree from a previous project. So I just used a silver Sharpie and labeled away.


I used the same idea here, and just used double-sided tape to label which towels go where. I'm kind of against folding towels all perfectly, when you're just going to use them anyway, so these baskets are just perfect to toss my small towels and rags into very easily.


The right cabinet has bins for "ironing & uniform care" (for my husband) and "swiffer pads & wipes." I like to keep things like starch, shoe shining stuff, safety pins, iron-on hem tape (my favorite!) and other ironing-related things together.


I also labeled these baskets for all of our extra stuff. We keep our cat food and litter box in the laundry room, so we have a bunch of cat stuff in one basket, and then we've got baskets for our vacuum stuff and other miscellaneous cleaning supplies like sponges, scrubbies, extra spray bottles, etc.


Behind the door, I used an over-the-door coat hanger for my Swiffers and my ironing board. The giant baby bottle is actually a piggy bank that I got at my baby shower a couple of weeks ago. It was filled with Hershey's Kisses which are now mysteriously gone, but that's neither here nor there :) My point is, I plan to use it for coins I pull out of pockets when I'm doing laundry. I just threw it on the laundry cart so it's handy when I need it!


Well, that's pretty much it for now. My next project will be tackling the closet on the other side of the room, so hopefully I'll be posting about that soon. And I want to get a few hampers for whites, darks and colors, because we currently just sort them into piles from our closet hamper. But with the baby coming, I know laundry will start piling up faster!


But for now, thanks for stopping my and not laughing at how much I love my laundry room!