
I've already posted about my open floor plan, which I adore, but we do have some space constraints that force me to get creative when it comes to storage. We have one small coat closet downstairs and no pantry or storage closets, so I've had to use this closet to house all of our stuff that compiles and compounds over the years.
Not to mention, I'm bracing for much more stuff to pile up once the baby arrives (any day now!). The ugly, mis-matched state of affairs was pretty sad to look at so I needed to identify what purpose this space needs to serve.
Before I shock you with the ugly "before" picture, here is my pretty hall closet now:

But here it what it looked like before:
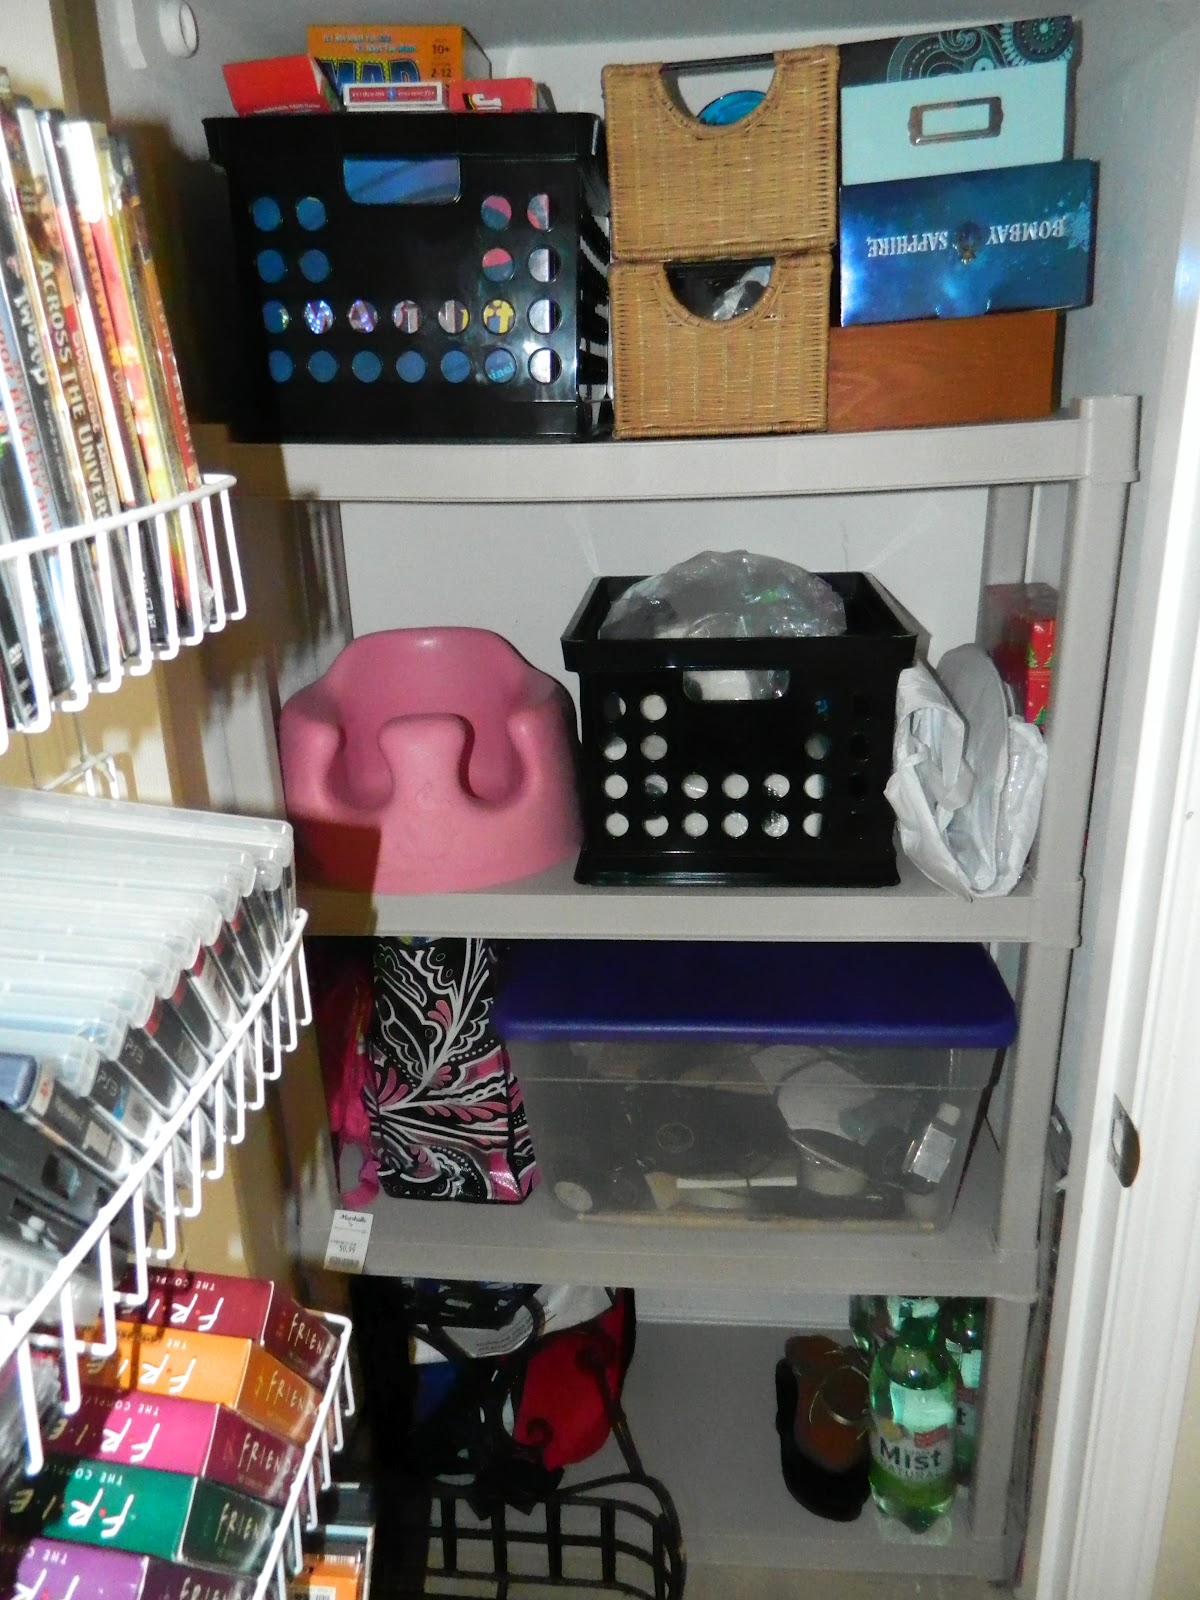
Pretty ugly, right?
So I broke things down into several main storage needs that must be filled:
- My husband's work accessories (he's got a lot of gear, and always comes home with paperwork and notebooks that I cannot throw away! Argghhhh!)
- My hudband's hockey stuff (same idea here - just a bunch of crap I can't throw away, and must be at the ready when he takes off for a game)
- Games (these include board games, party games and accessories for our PS3, xBox, and that motion-sensor game thingey, including all cords and cables. Obviously I'm not a huge gamer.)
- Batteries/Camera/Camera accessories. (no more searching through the house for the USB cable to upload pics, or for those AAA batteries you need in a pinch)
- Toys! (we hardly have any yet, but I know we'll need a place to stash them downstairs when I want to do a quick tidy-up without running upstairs to the baby's room)

Now, think back to kindergarten when everyone had their own little cubby. That wasn't such a bad idea!
I bought nine of these canvas storage cubes for $6 each, and simply filled them up with our stuff.

To brighten things up a little more, I found these vibrant cards in the clearance end-cap of the greeting card section:

Then I just wrote with Sharpie on some sticky labels, slapped them on these cards (which I glued shut with a gluestick), and hot-glued the finished product to the front of my bins, like this:

Of course, I measured the width and depth of my shelves before buying these cubes. They happened to be 10x10, which fit my 30-inch shevles perfectly! And I love how the bright colors make this a much more cheerful space.

I needed bigger storage on the bottom shelf, so I re-used some old plastic bins we had and slapped some labels on those too.

I just love that everything has it's own little place!
My next goal is to remove the hanging DVD rack on the door, get some media file bins from The Container Store, and trash the bulky containers altogether. Once we start building up a movie collection for the little one, we will keep those in their cases so she can pick and choose what she wants to watch. But for our DVD collection, it's just too bulky and taking up valuable real estate on the inside of the closet door.
Down the road, I'm thinking we'll use another kind of over-the-door storage rack to corral kid stuff or other odds and ends. Oh, and I have a shoe rack and coat/purse hooks in the entry way, making the need for coats in my "coat closet" obsolete. Here's a pic:

And here's one more look at my cheap, quick and easy, $60 hall closet revamp:

Now it's on to the next project!

No comments:
Post a Comment